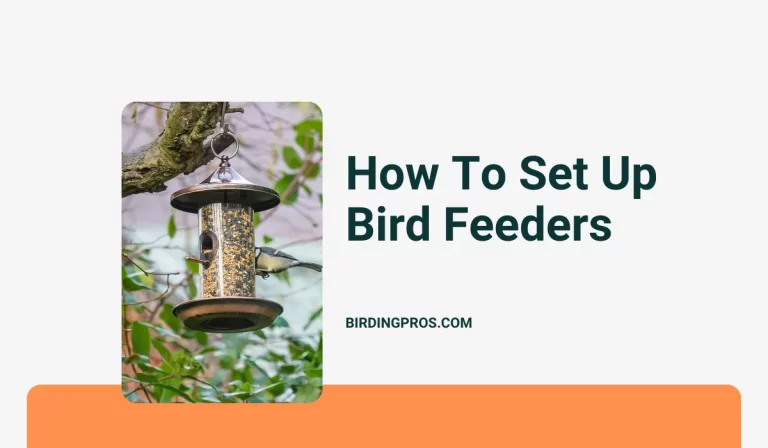
Make a DIY Bird Feeder at Home (Step-by-Step Guide)
If you love watching birds visit your yard, making your own bird feeder is a simple and rewarding project you can do right now. Imagine the joy of seeing colorful birds gather around something you built with your own hands.
This step-by-step guide will walk you through creating a DIY bird feeder using easy-to-find materials and tools. You don’t need to be a woodworking expert or spend a lot of money-just follow along, and soon your garden will be full of life and song.
Ready to bring nature closer to your home? Let’s get started!
Materials Needed for DIY Bird Feeder
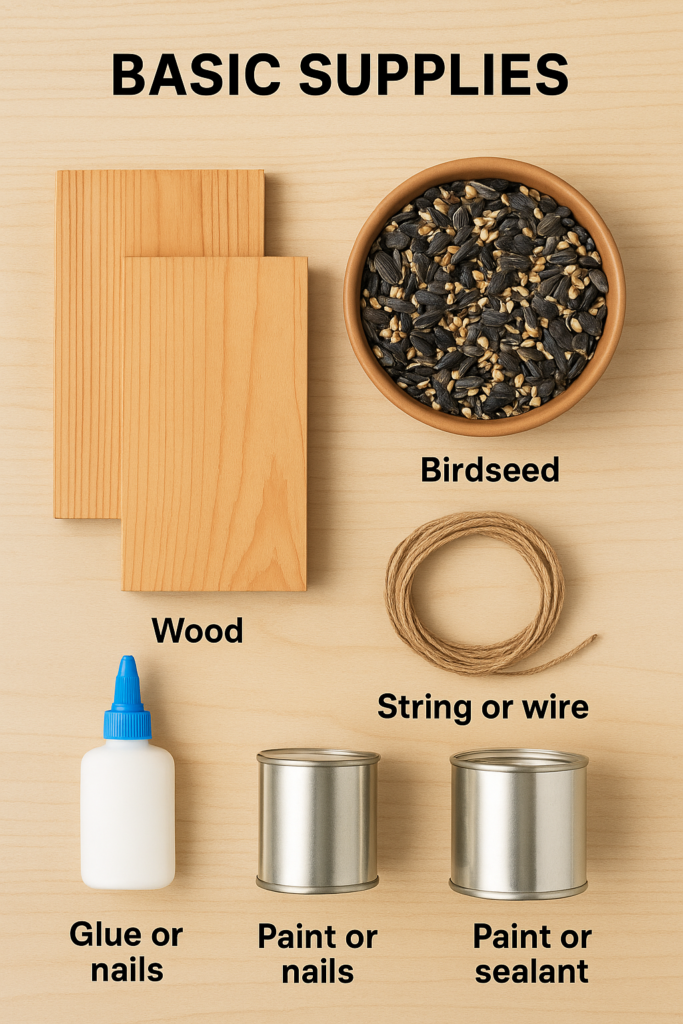
Gathering the right materials before starting your DIY bird feeder project makes the process smooth and enjoyable. Knowing exactly what you need helps you avoid interruptions and keeps your creativity flowing. Let’s look at the essential items you’ll want to have on hand.
Basic Supplies
- Wood: Pine or cedar boards are great because they’re durable and safe for birds.
- Birdseed: Choose a mix that attracts local birds—sunflower seeds are a popular choice.
- String or wire: For hanging your feeder securely from a tree or hook.
- Glue or nails: To hold the parts together firmly.
- Paint or sealant (optional): Use bird-safe, non-toxic options to protect your feeder from weather.
Have you ever started a project only to realize you’re missing a key item? Having these basics ready saves you from that frustration.
Optional Decorations
- Bright acrylic paints: Add color to make your feeder stand out and attract birds.
- Natural elements: Pine cones, twigs, or small stones can give your feeder a rustic look.
- Stencils or stickers: Personalize your feeder with fun designs or bird shapes.
- Waterproof markers: For adding names or messages that won’t fade easily.
Would you prefer a simple look, or something vibrant that doubles as garden art? Decorations let you match your feeder to your outdoor style.
Tools Required
- Hammer and nails or screwdriver and screws: Depending on your construction method.
- Measuring tape: Ensures all pieces fit perfectly.
- Sandpaper: Smooths edges to keep birds safe from splinters.
- Paintbrushes: For applying paint or sealant evenly.
- Drill (optional): Makes holes for hanging or ventilation.
Do you have these tools ready, or will you need to borrow or buy some? Preparing your workspace with the right tools makes building faster and more fun.
Choosing The Right Bird Feeder Type
Choosing the right bird feeder for backyard is important for attracting birds. Different feeders suit different bird species and environments. Picking the right style makes feeding easier and more enjoyable. It also helps keep the feeder clean and safe for birds. This guide covers popular DIY feeder types you can make at home.
Bottle Feeders
Bottle feeders use empty plastic bottles to hold seed. They are easy to make and refill. Small holes or tubes release seeds slowly. These feeders work well for small birds like finches and chickadees. They hang easily from trees or hooks. Bottle feeders protect seeds from rain and wind.
Jar Feeders
Jar feeders use glass or plastic jars to hold food. They often have a base for birds to perch on while feeding. Jars can hold seeds, nuts, or suet. They are sturdy and simple to clean. Jar feeders attract a variety of birds including sparrows and nuthatches. Make sure to secure the lid tightly to avoid spills.
Suet Feeders
Suet feeders hold blocks of suet, a high-energy food for birds. They are great for woodpeckers, wrens, and other insect-eaters. These feeders can be homemade using wire mesh or small cages. Suet feeders should be placed in shaded areas to prevent melting. They offer a different food source than seed feeders.
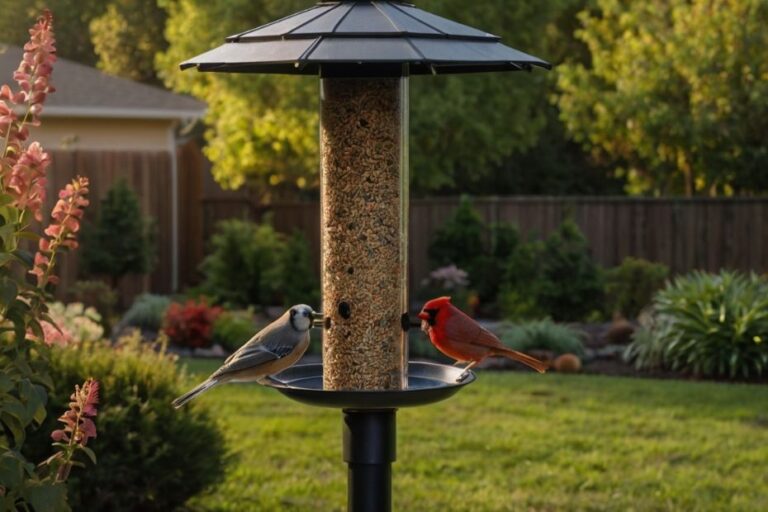
Platform Feeders
Platform feeders are flat surfaces where you can place various foods. They attract many bird species because of easy access. These feeders are simple to build from wood or recycled materials. Platform feeders need regular cleaning to keep birds healthy. They work well for larger birds like doves and jays.
Read More: 18×18 Bird Cage for Your Home: Top Picks and Buying Guide
Step-by-step Construction
Building your own bird feeder is a fun and rewarding project. This step-by-step guide helps you create a simple feeder from basic materials. Follow each step carefully to ensure your feeder is safe and functional. You will enjoy watching birds visit your garden in no time.
Preparing The Container
Choose a clean, sturdy container like a plastic bottle or small wooden box. Remove any labels and wash it thoroughly. Dry the container completely before moving to the next step. Mark the spots where feeding ports will be cut. Use a marker for clear, visible lines.
Adding Feeding Ports
Cut small holes at the marked spots using a sharp knife or scissors. Make sure the holes are large enough for birds to access the seeds. Smooth the edges with sandpaper to prevent injury to the birds. Add small perches below each hole for the birds to sit on while feeding.
Assembling Parts
Attach all parts securely using non-toxic glue or small screws. Fix the perches firmly under the feeding holes. If your feeder has a roof or cover, attach it now to protect seeds from rain. Check that all pieces fit well and nothing is loose or sharp.
Securing The Feeder
Choose a strong string or wire to hang your feeder. Tie it tightly to avoid swinging or falling. Hang the feeder from a tree branch or a hook in your garden. Place it where birds feel safe and have easy access. Regularly check the feeder for damage and refill seeds often.
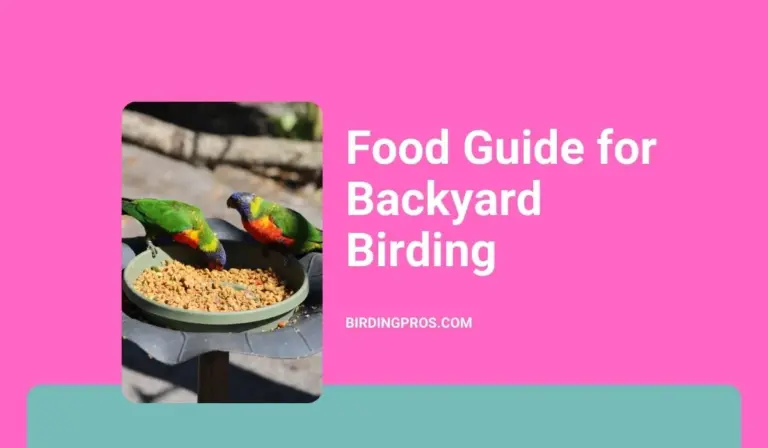
Selecting Bird Seed
Selecting the right bird seed is key to attracting birds to your DIY feeder. Different seeds attract different bird species. Choosing fresh and suitable seeds makes your feeder inviting and safe. This guide helps you pick the best seeds for your new bird feeder.
Popular Seed Types
Black oil sunflower seeds are a favorite for many birds. They have a thin shell and high oil content, which provides good energy. Millet is another common seed, loved by small birds like sparrows and finches. Nyjer seeds attract finches and siskins with their tiny size. Mixed seed blends offer variety, but check the ingredients carefully.
Seed For Specific Birds
For cardinals, safflower seeds work well because they prefer this seed over others. Peanuts or peanut pieces attract woodpeckers and jays. Thistle or nyjer seed is best for finches. For ground-feeding birds like doves, milo or cracked corn is suitable. Choose seeds based on the birds you want to see at your feeder.
Avoiding Spoiled Seed
Always buy fresh seed from a trusted source. Spoiled seed can grow mold and harm birds. Store seed in a cool, dry place to keep it fresh. Avoid seed with dust or debris, as it indicates poor quality. Check the seed regularly and replace old seed to keep birds healthy.
Best Placement For Your Feeder
Choosing the best place for your DIY bird feeder is key. It helps attract birds and keeps them safe. Proper placement makes your feeder more inviting and easier for birds to find.
Safe Locations
Place your feeder where birds feel secure. Avoid spots near busy roads or noisy areas. Trees or shrubs nearby offer shelter from predators. Keep feeders away from windows to prevent bird collisions.
Sunlight And Shade
Pick a spot with a mix of sun and shade. Morning sun warms the feeder and dries seed moisture. Afternoon shade protects birds from heat. This balance keeps birds comfortable throughout the day.
Visibility For Birds
Make sure birds can easily see the feeder. Open spaces allow birds to spot food from afar. Avoid cluttered or dense areas that hide the feeder. Clear sightlines help birds approach safely and confidently.
Keeping Squirrels Away
Squirrels often raid bird feeders, stealing seeds meant for birds. Keeping squirrels away helps ensure birds get their food. Simple tricks can keep these clever animals at bay. Protect your DIY bird feeder with easy, effective methods.
Physical Barriers
Install baffles above or below the feeder. These round or cone-shaped guards block squirrels from climbing. Place the feeder on a smooth metal pole to stop climbing. Avoid trees or structures close to the feeder. Squirrels can jump about 10 feet, so place feeders away from jump points.
Natural Deterrents
Use spices like cayenne pepper or chili powder on birdseed. Birds do not mind the spice, but squirrels dislike it. Sprinkle coffee grounds around the feeder base. The strong smell keeps squirrels away. Plant mint or garlic near feeders. These plants have scents squirrels avoid.
Feeder Design Tips
Choose feeders with weight-sensitive perches. These close the seed ports under heavy weight, blocking squirrels. Use feeders made of metal or hard plastic. Squirrels find it hard to chew these materials. Avoid feeders with large openings that squirrels can reach inside.
Maintenance And Cleaning
Maintaining and cleaning your DIY bird feeder is important for the health of visiting birds. A clean feeder prevents the spread of diseases and keeps birds coming back. Regular care also extends the life of your feeder and keeps it looking good.
Regular Cleaning Schedule
Clean your bird feeder every two weeks. Use warm water and mild soap. Rinse it well to remove all soap residue. Dry the feeder completely before refilling. In wet weather, clean more often to prevent mold growth.
Preventing Mold And Disease
Remove old or wet seeds daily. Mold can grow quickly and harm birds. Avoid using harsh chemicals that can leave toxic residue. Use a vinegar solution to disinfect the feeder safely. Keep the feeder dry and in a sunny spot if possible.
Replacing Seed
Replace bird seed regularly to keep it fresh. Wet or clumped seeds should be tossed out. Use high-quality seed suitable for local birds. Store seed in a cool, dry place to prevent spoilage. Fresh seed attracts more birds and keeps them healthy.
Fun Customization Ideas
Customizing your DIY bird feeder adds a personal touch and attracts more birds. It makes the project enjoyable and unique. Simple changes can turn a basic feeder into a charming garden feature. Here are some fun ideas to inspire your creativity.
Painting And Decorating
Choose bright colors to paint your bird feeder. Use non-toxic, weatherproof paint to keep birds safe. Patterns like stripes or polka dots add a playful look. You can also add stickers or small decorations. Seal the paint with a clear coat for durability. Painted feeders stand out and bring life to your yard.
Adding Perches
Perches give birds a place to rest while feeding. Use small wooden dowels or sticks as perches. Attach them securely below the feeding area. Different lengths and shapes make it easier for various birds to land. Perches invite more birds and make feeding easier for them. Adding a few perches creates a welcoming spot for birds.
Using Recycled Materials
Recycled items make feeders eco-friendly and budget-friendly. Use old teacups, jars, or tin cans as feeding containers. Cut and shape plastic bottles to create unique designs. Recycled wood can be used for the frame or base. This reduces waste and adds character to your feeder. Creative reuse of materials helps the environment and looks great.
Frequently Asked Questions on how to make a diy bird feeder
How Do You Make A Bird Feeder Step By Step?
Cut a container or use a plastic bottle. Punch holes for drainage and hanging. Fill with birdseed. Thread string through holes. Hang feeder outside where birds can easily access. Watch and enjoy as birds visit your feeder.
What Is The 5 7 9 Rule For Bird Feeders?
The 5 7 9 rule for bird feeders means placing feeders 5, 7, and 9 feet away to deter squirrels effectively.
Why Should I Sprinkle Coffee Grounds Around My Bird Feeder?
Sprinkling coffee grounds around your bird feeder deters pests like ants and slugs naturally. It also enriches soil near plants.
What Materials Make A Good Bird Feeder?
Good bird feeders use durable materials like wood, metal, and recycled plastic. Avoid toxic paints or chemicals. Choose weather-resistant, non-toxic materials that attract birds and withstand outdoor conditions.
What Materials Do I Need To Make A Diy Bird Feeder?
You need wood, nails, glue, a saw, sandpaper, and birdseed to build a simple feeder.
Conclusion
Building your own bird feeder brings joy and nature closer to home. Follow each step carefully for best results. Use simple materials found around you to save time and money. Place your feeder where birds feel safe and can easily find it.
Watch patiently as birds visit and enjoy the food you provide. This DIY project offers fun and helps local wildlife thrive. Keep your feeder clean and refill it regularly for happy birds. Start today and enjoy peaceful moments with nature right outside.